As you may have read by now with Spriter’s “Character Maps” feature, you can set up your Spriter
project to allow for real-time swapping or hiding of any of the used images in order to create large
varieties of possible visual combinations, for alternate characters, outfits, etc. It’s possible to greatly
expand on this level of customization by adding the ability to exchange and combine color combinations
as well.
Our RPG Heroes Art Pack uses this combination of Character Maps and Custom Color Palette
manipulation to offer a massive assortment of possible character combinations to the user. While this is
feature does offer some great benefits, it’s much more complicated to use than Character Maps, and puts
much stronger technical demands on the artist creating the images.
Another thing that is very important to keep in mind is that at the time this manual is being written, no
Spriter run-time (plug-in) for any language or authoring system has support for using these Color Palette
manipulations at run time. This means unless you confirm that the runtime you’ll be using for your game
authoring system of choice actually supports the Color Palette features, then be sure you are using it only
for creating exported full frame images or sprite sheets, or, to “bake out” the final Color Palette
combination to all images permanently before using them in your game engine.
Here’s how it works:
The most important thing to know if you want to use this feature is the difference between “full color”
images and “indexed color” images”:
Full color images contain the full color information for every
pixel of the image, as well as the level of opacity for each pixel. This
makes the file size much larger, but allows for absolute freedom for the
artist at the time of creating the artwork. This is what’s typically used
in modern games and web graphics.
Indexed color images allow for a
limited number of colors that all pixels
must share from. This limited set of
colors is often referred to as the color
“palette”, and each color in the palette
has an index (a number) color index zero
would mean the first color, index 255
would be the last color (256 colors total).
This type of images takes up less file
space because instead of having full
color data for every last pixel, it simply
has the color index from the palette that
any given pixel should use. The other
benefit of indexed color images is, that
with programming tricks, tools like
Spriter can allow users to customize
these “color palettes” on the fly, so suddenly, the user is not just choosing from 5 different style of shirts
for example, but can now also mix and match from an nearly unlimited number of color options for each
shirt style as well! On top of the limited number of colors however, there are other trade-offs when using
indexed color mode.
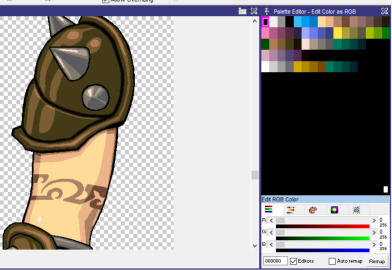
a) In most or all modern digital painting tools, the vast majority of features will not work in indexed
color mode! For this reason, if you’d like to use the color features, we recommend you find and learn a
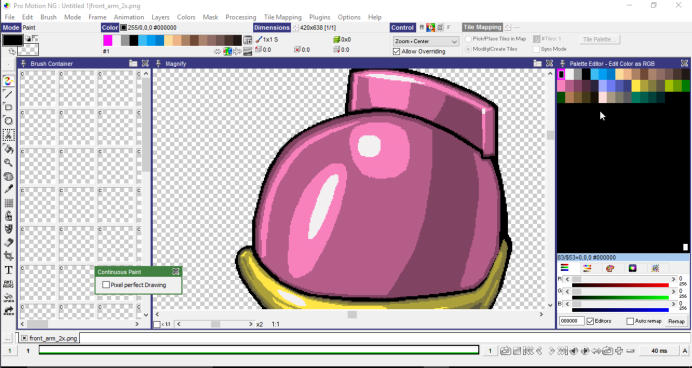
pixel-art program, specialized for working in indexed color mode. The one I’ll be using in all the tutorials
will be Pro Motion NG by www.cosmigo.com
b) because there is no alpha (opacity) level data per pixel, there’s no semi-transparent anti-aliasing
around the edges of your art. This means you need to take your time and be more precise with your art-
work and make sure the
outlines are as clean as
possible to ensure high
visual quality of the final
animations in game.
HERE’S HOW
1) Use a pixel art program
like Pro Motion, create
your art, making sure all
aspects/images for the
animations you’ll be
creating are using the
same, organized color
palette… for example,
make sure all color ranges
are from light to dark, make color indexes 1 through 8 the colors used for skin (color zero typically
reserved for the transparent background color) Be sure to save your images out with color zero (the
background color) set to transparent.
IMPORTANT: Be sure to make sure you’re saving your images in indexed color mode and that you
do not have the program set to “save in lowest bit depth” or “save with fewest colors” as these
settings would destroy the order of the color palette.
2) Now that your Spriter project has images to use and you’ve started to assemble your animations, you
may be ready to explore color palette customization options. In order to do this, the first thing you’ll need
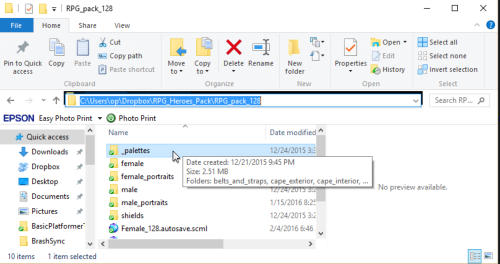
to do is create a folder called “_palettes” in the root folder of your Spriter Project. It must have that exact
name. You can then set up sub folders (named whatever you’d like) within the “_palettes” folder.
3) Now you have to create special palette image files (in your “_palettes” folder) which will give Spriter
the color data needed for the colors you want this palette image to change. Let’s get back to the idea of
skin tones. In this example, lets say you had used the first several indexes (after index zero, which is
transparent) for skin tones in all your images. To create a palette image to allow for applying a new skin
tone, you’d need to edit those specific color indexes in an images to have the new skin colors.
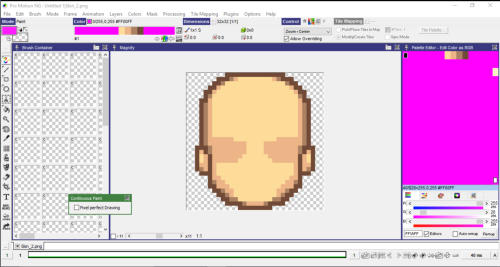
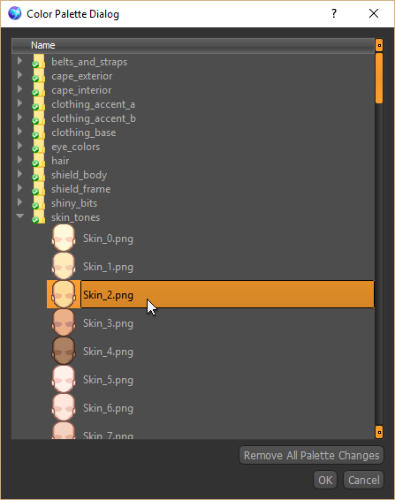
I highly recommend you
create a custom 32x32
pixel image representing
what the palette image will
be effecting, and which
uses those specific color
indexes. Look how for the
RPG Heroes Pack, I made
the skin-tone palette
images look like a blank
face. This allows the user
to instantly recognize both
what the image will effect,
AND what the new skin-
tone will look like.
IMPORTANT: Aside from making sure all images use the same palette arrangement (same indexes being
used for the same things, such as skin tones), the most important thing you need to remember is that ALL
color indexes other than the colors you want your palette image to effect MUST be set to what is called
“programmer pink”. This is RGB value 255,0,255 or hex(web) value: ff00ff . This is how Spriter knows
which colors to effect when the user selects that particular palette image.
Once your Spriter project has animations or frames made of indexed images, and palette files ready to
effect them, you’re ready to start applying the palette files to the current character map “stack” so that you
can create custom visual variations for your animations.
To do so, you‘d do the following:
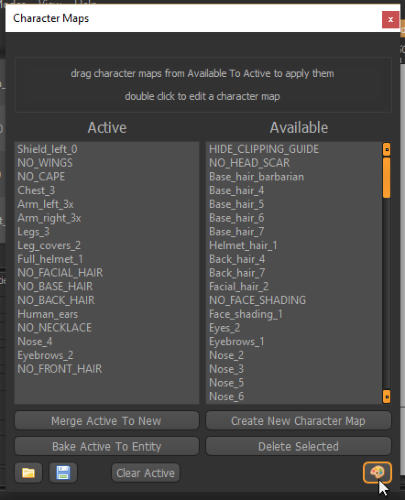
1) Click the “Char Maps” button at the
top right of the animations palette to
bring up the Character Maps dialogue.
Then click the small painting palette
looking icon at the bottom right of the
Character Maps dialogue. This will
bring up the “Color Palette Dialogue”
2) Now just navigate through the palette
image files in the “_palettes” folder, left
click on any image who’s colors you’d
like to effect your animations. If you
change your mind about a specific change
you’ve made, just left click that palette
image one more time and it will remove
its effect.
3) Once you’re finished applying all of
the image palettes you’d like, click OK at
the bottom right of the “Color Palettes
Dialogue”, then be sure to save the
character file (scms), which will save not
only the current color palette
configuration, but also any active
character maps into a single small file you
can reload any time you want to edit or
re-export animations for this specific
custom appearance. To save the character
file, just click the small blue disk icon at
the lower-left of the “Character Maps”
dialogue, then choose the name and
location for your file and click “Save”.
Using Spriter’s Custom Color Features
Spriter Pro User’s Manual version 1.4