Papagayo is a great (and free) program made by Mike Clifton and is distributed by
LostMarble.com.Papagayo is designed to help you line up phonemes (mouth shapes) with the actual
recorded sound of actors speaking. Papagayo makes it easy to lip sync animated characters by making the
process very simple - just type in the words being spoken (or copy/paste them from the animation's script),
then drag the words on top of the sound's waveform until they line up with the proper sounds.
Papagayo Lip Sync Support in Spriter Pro
Spriter Pro User’s Manual version 1.4


TM

Papagayo can be downloaded from http://www.lostmarble.com/papagayo/ for either Windows or Mac.To
add lip syncing to your Spriter animation you must follow the following steps after installing Papagayo:
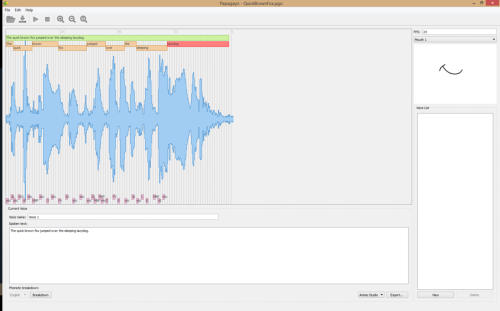
1) Start Papagayo and load up your WAV file containing the dialogue into Papagayo by dropping the file
into the designated spot in Papagayo’s window. Then in the “spoken text” window, type all of the words
spoken in the sound file in their propper order. once you do so you’ll see orange blocks representing all the
individual words spread out across the graphic representation of the sound file. Now left click and drag on
the beginning block or the ending block of each word to properly make each word start and end properly
according to the actual sounds.

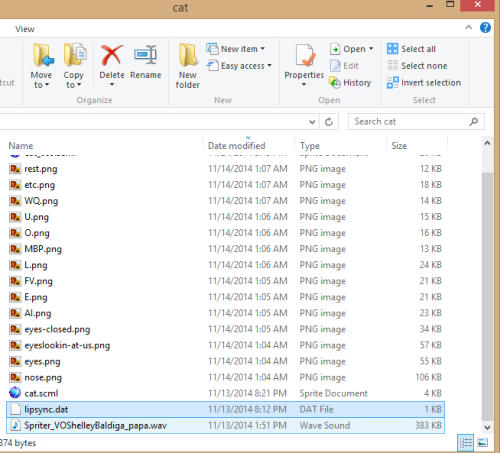
2) Once all the words are properly aligned, export the file (DAT) from Papagayo making sure to have the
export mode set to Anime Studio. (it is by default). Then make sure the sound file. (WAV) and the DAT file
from Papagayo are in your Spriter projects folder, either directly or in a sub folder.

3) In order for lip syncing to work, you need to have created a series of swappable mouth images, each
carefully designed to represent the pronunciation of specific sounds that people make while speaking.
Each file must be carefully named exactly like the reference chart above shows. Create a folder in your
Spriter project folder for each of the angles the mouth will be seen from...for example a folder called
“mouth_sideview” and one called “mouth_frontview” and put all the appropriate mouth images into their
folders. The animation you’ll be applying lip sync to should already have one of these mouth images
present throughout the entire timeline, the “rest” image for example. If your head changes angles within
the animation, you can image swap the mouth image at that point in the timeline from the mouth image
“rest” in one folder to the “rest” image in the folder for the different angle...such as changing from front
view to side view. (you can find other mouth shape references here:
http://www.brashmonkeygames.com/spriter/Papagayo/PapagayoMouthShapes.html)

4) In Spriter, once the animation is otherwise finished, add the sound file at the proper point in the
animations time line. IMPORTANT: Because the next step in the process will permanently add a very
large amount of key frames to the animation, which would make editing the animation after the fact
very difficult, we highly recommend you first create a clone of the animation as a back-up BEFORE
you proceed to step 4!

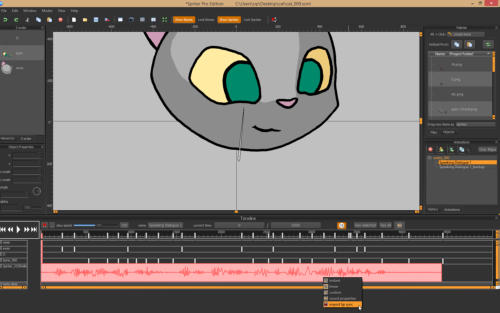
5) Assuming you’ve made a backup copy of your otherwise finished animation as described above, now
just find and right click on the graphical representation of the sound file in the timeline, and choose
“import lip sync”. Then a small dialogue box will appear asking you to choose the lip Sinc File (This is the
DAT file exported from Papagayo) and the “Mouth Timeline” (this is asking for the name of the object
timeline, aka the sprite which Spriter will be image swapping to represent all the mouth shapes for the lip
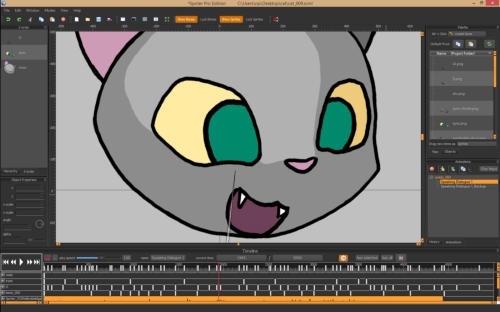
syncing. Once these options are set properly, click OK and the lyp syncing process should add all the
necessary keyframes to the animation in order to change the mouth image at the appropriate times to
represent the sound being made at that moment in time. Remember, if you need to change the animation
after importing the lip sync, you should once again copy the back up of the animation that was created
BEFORE the import of lip sync, edit the copy, and then re-import the lip sync. This process will ensure
you always have a clean, lip sync free version of the animation to change and edit as needed
