Let’s say you’ve nearly completely an animation but then decide you want to change some aspect of the
character’s appearance… for example, longer torso, longer forearms, etc. This could be a very problematic
and time consuming situation to deal with. Luckily Spriter Pro offers a feature to help make changing
individual aspects of any given object easy.
Copying Individual Attributes of an Object to All Frames
Spriter Pro User’s Manual version 1.4


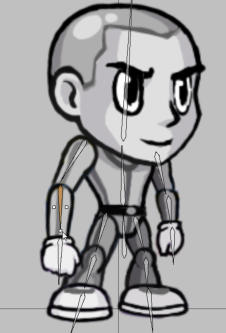
For this example, We’ll be taking the free example Spriter file called “Grey Guy” and changing the
forearm images and bones in the idle animation to give him very long forearms.
Here’s how.
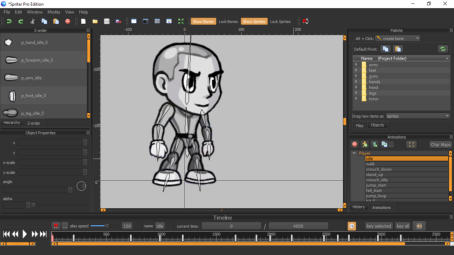
1) Load up the Spriter file in
Spriter and click on the Idle
animation so we can start
editing on the fist keyframe at
zero seconds in the timeline.
4) Once both forearm images are their new scale and saved over the originals, go back into Spriter and
click the reload images button near the top right of the “files palette”. You’ll see the new forearm images,
but they will now look too long.
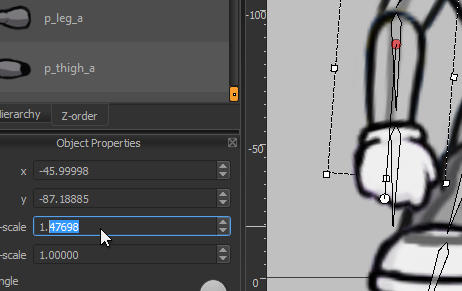
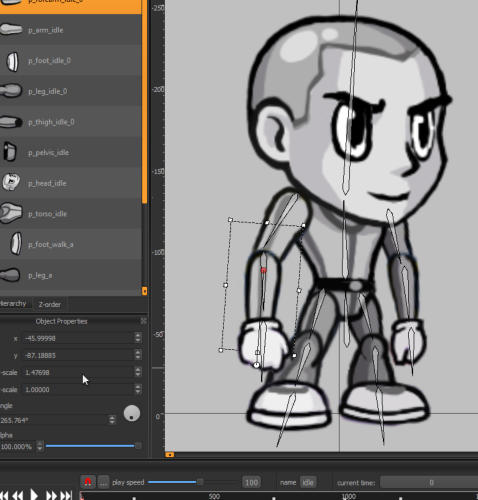
2) Select each forearm bone and stretch the forearm until the new length is to your liking. Now click the
forearm images and remember the number in the x scale attribute in the properties palette for each of them,
as you’ll need this later.
note: In this case we need to be very exact because we’ll be editing the image files to match the new scale.
but if this is not needed, you don’t need to use the numerical settings in the objects properties palette.
3) If you don’t want the forearm images to be stretched to match the new size, and you want them to
actually be the new size, then, using your graphics program of choice, find the forearm images that are
being used in the arms folder of the Spriter project, and scale them to the same percentile and in the same
direction that you did in Spriter in step 2. For example, if the new scale of the forearm image in Spriter is
1.47, that means its 147 percent of the original size.
5) Now just select each forearm image ans switch their x-scale to 1 in the properties palette.
6) Now your changes look correct, BUT are only
effecting the first keyframe at zero in the timeline.
If you scrub to other key frames you’ll see things
are a bit messed up. Don’t worry… here’s comes
the part were we copy the new properties to all key
frames. Go back to the very beginning of the
timeline (the very first key frame that has your
proper changes.) Select each forearm BONE by left
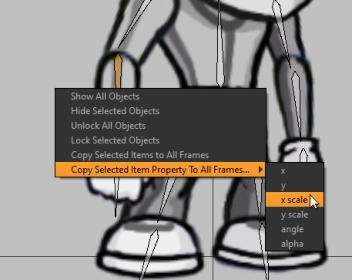
clicking it, then hold the right mouse button on a
blank part of the canvas and select “Copy Selected
Item Property to All Frames/ x scale”. Then do the
same thing for each forearm image.
7) We’re not quite done yet. Because each forearm bone also effects the child bones (hands) and therefore
the hand images indirectly, we must do the same for the hand bones. Select them at zero in the timeline,
one at a time, and choose the same option via holding the right mouse button on a blank part of the canvas
and selecting “Copy Selected Item Property to All Frames/ x scale”
Once you finish this, if you play the animation you should see the new gibbon-like forearms are correct
throughout the animation.
NOTE: For this example, we almost could have multi-selected the forearm bones, hand bones, and forearm
images once the first keyframe was perfect and then right clicked on a blank part of the canvas and
selected “Copy Selected Items to All Frames”, because they don’t change any other attributes throughout
this specific animation. BUT, for animations where the forearms change angle or scale or image being
used throughout the animation, we would have lost those changes in the respective keyframes.
