Action Points can be placed anywhere in your animation and can be used by game engines to determined
from which coordinate objects will be spawned (for example where should a bullet come from), and at
which angle. Just as with Collision Rectangles, you can place as many individual Action Points per key-
frame as you’d like, and give them all distinct names to easily keep track of them within Spriter and within
your game engine.
To create Action Points, do the following.
Adding Action Points to Frames
Spriter Pro User’s Manual version 1.4


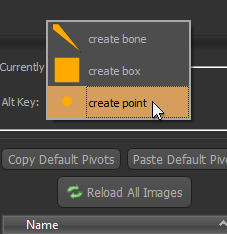
1) Left click on the Currently Equipped Tool type at the top of the
Palette located near the top right of your screen, and select “create
point”
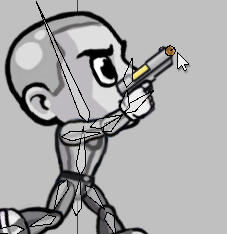
2) Make sure you’re at the position in the timeline (or keyframe) you
want the Action Point to exist, then hold the Alt key and left click and
drag on the canvas to create your Action point and simultaniously set
its angle. Just a quick click with no dragging would create the point
with it’s angle set to zero (aiming perfectly rightward). You can then
copy and paste it to other keyframes, or use the paste to all keyframes
option to propagate the Action Point across the entire animation if
you so desire.
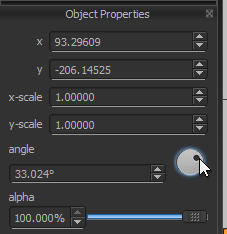
3) Once in place, you can left click and drag it to change its position,
or use the Object Properties dialogue to tweak its angle.
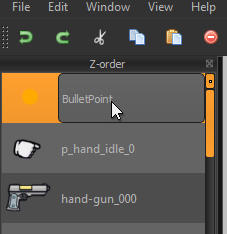
4) By double-clicking on the name of the rectangle in the Z-order
palette, you can give it any name you’d like for easy recognition of the
rectangles purpose.